Legacy:
At version 3.0, it’s no longer necessary to tag a group with M4CC to find content in your organization (as outlined in this topic). Instead, find content in your organization by searching the following data categories in the extension: My Favorites, Groups, and ArcGIS Online or ArcGIS Enterprise. If you’ve already set up groups with the M4CC tag, you can still find that content in the My Organization category. However, after this release, groups tagged with M4CC will no longer work in this way. Rather than create groups tagged with M4CC, use standard methods for sharing content in your organization.
Create groups in your ArcGIS organization and configure them with M4CC tags to display subfolders in the My Organization node when searching for specific content to use in the extension.
Plan your folder structure
The first step is to plan the type of data folder structure you want to have. Every organization has its own preferences for how its GIS data folders are structured. Yours may prefer to organize by data type (points, lines, polygons) or by data location (for example, by continent, state or province, county, and so on.). Image 1 shows a few examples of the many possibilities of GIS data file saving structures.

Plan ahead to have an efficiently organized data filing structure that aligns with your GIS file saving structure.
Create a group and add the M4CC tag
Once you've planned your data filing structure and have some layers and web maps that you want to include, you can begin creating groups. These groups are analogous to the subcategories in Image 1. It may seem counterintuitive at first, so it is important to note that the groups you create will be the subfolders of your main data categories. For example, if you were setting up your data for the extension based on the Real Estate category in Image 1, you could create two groups: Commercial and Residential. The steps outlined below demonstrate how data would be structured under DesignMaps > Data Type, where DesignMaps is a category and each data type represents subcategories such as Hydrography, Landuse, Cultural Points, or Transportation. To create a group for a subcategory in your content, complete the following steps:
- Verify that you are signed in to your organization and have privileges to create groups.
- Click Groups at the top of the page.
- On the My Groups tab, click Create group.
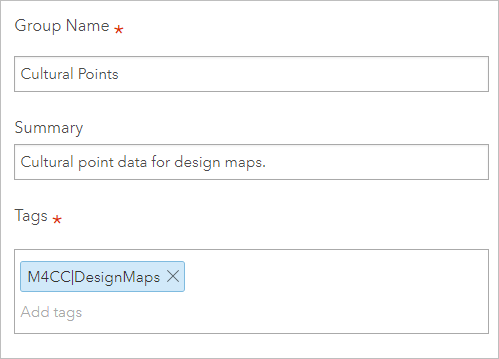
- Name your group the name of the subcategory (subfolder). In the case of the example, you would first create a group called Cultural Points (see Image 2).
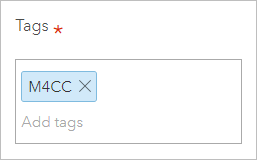
- Add a tag called M4CC to the group.
This tag will allow the group to appear in the My Organization category when browsing maps and layers in the extension.

- Complete the rest of the group settings and save your changes.
- Share the web maps or layers to this group that you want to find in the extension for the corresponding subcategory.
Create subfolders
This section demonstrates how to create an additional folder structure to match your categories (Image 2). Creating subfolders is optional and may be used only if you intend to match or create any additional folder structure.
Edit the group item and replace the tag with one that begins with M4CC followed by a pipe (|), then followed by the name for a main category folder. In this case, Design Maps.

Note:
There should be no spaces surrounding the pipe.
To prevent redundancy in the folder structure, don't use the name of the group in the tag when defining this folder structure.
Do not add more than one tag with M4CC to a group. Depending on the number and order of subcategories or folder pipes (|) set in each tag, adding more than one will cause items in that group to appear in multiple locations in the web maps dialog box, which may cause confusion.
Find content in your tagged groups
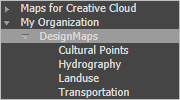
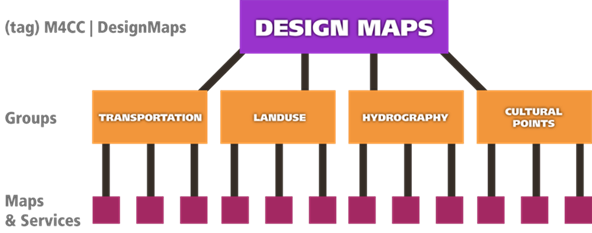
Now your tagged groups and respective subfolders appear in the My Organization data category when searching content in the extension. Sign in to the organizational account where the groups were created. In the example, when adding content to the map, the data can be found nested in the DesignMaps folder (see Image 3). All the M4CC tagged groups are nested based on the configured tags. Image 4 shows the Cultural Points, Hydrography, Landuse, and Transportation groups as subfolders under DesignMaps because each group was tagged with M4CC|DesignMaps.

